How to Tape Your Hula Hoop

Step By Step Guide

Guide Overview

In this Guide, I am going to show you how to tape an amazing hula hoop design.

I’ll share you some design secrets, go over F.I.G. compliance, and safety tips.

As a bonus, I’ll teach you how to keep your hoop in tip-top shape.

By the end of this guide, you’ll know exactly how the pros do it!

Let’s get started.
Finished Hula Hoop Taped Design

Materials Needed To Tape A Hoop

Plan your colors and materials ahead of time. Invest into quality materials so that your your hard doesn’t go to waste.

  • Your Hoop
  • Scissors
  • Scotch Tape – Clear
  • “Colored Tape”
  • Alcohol/ Paper Towels (To Clean Adhesive if Re-Wrapping)
  • Stamp Cuts (Optional to Add Extra Designs)
This tutorial will work for everyone, but if you plan to use the hoop for rhythmic gymnastics and don’t know what size to get, you can check out our apparatus guide. In this tutorial we will be using a Jassy Gymnastics Hoop. Try to use colors that will compliment the outfit and match. If you are unsure, stick to 1 or 2 primary colors and just 1 secondary color.

TIP: If you are just starting out, keep your design and colors simple. You don’t want to stress yourself out with something that should be fun. Remember most people won’t get it right their first time. Stay relaxed and enjoy the process. 🙂

Chapter 1:

Step 1: Starting Tips

Now that we have all our materials on hand, you can start laying the foundation of our design.

This is a neat trick I learned that is especially useful for hoops with rivets.

Keep in mind that making mistakes and repeating steps is a normal part of the learning process.

Step 1 of Designing Rhythmic Gymnastics Clubs is Starting to Tape at the Top

Hoops that are attached at contact points can come apart without proper support. You will definitely want to add some extra support to help prevent your hoop from falling apart. 

Adding Electrical Tape to Strengthen your Hula Hoop First Step
1)Take electrical tape and add a thin roll on the part that is visibly attached (this may not apply to hoops that were molded as one piece).
White Electrical Tape Applied to Rivets On Hula Hoop for Strength

TIP: Avoid air bubbles keeping the tape tight, as your roll it around the hoop. Keep your eyes open for air bubbles. If you see air bubbles, use your fingers to push them out. If you can’t get the bubbles out, it is best to try to re apply with a new piece of tape.

GYMNASTICS NOTE: As of November of 2018 F.I.G. related events must use F.I.G. certified products. Make sure to leave a certified mark or label visible when applying your design if you plan to compete professionally. 

FIG Logo

This is an important step, especially if you are using your hoop for intense  routines. Your hoop is thrown to great heights! 

Chapter 2:

Starting Your Simple & Easy Design

In this chapter ill show you a tip to help keep your design symmetrical so you  can achieve the same look from all angles.

As well as an over the shoulder look on how we apply a quick 2 color design.

This is where the fun really starts. 

Using Blue Tape for Our Jassy Hula Hoop And Cute Puppy

1)Set markers to help guide you through the design. Half way points on each side will indicate when to switch colors. The Design I am making today will be made of two base colors using blue and a light transparent pink. 

Taping Blue Halfway Point to Hula Hoop to Guide Design and Cute Puppy

2)I begin by adding my blue tape around the hoop to the half way point. Keep an eye on the distance of the overlap as you wrap the hoop. You dont want to waste too much tape or weigh your hoop down too much.

Taping Blue Color to Hula Hoop Basic Steps and Puppy

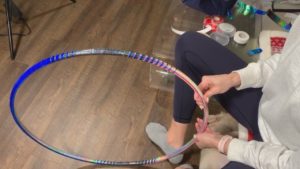
3)At the half way I switch to the pink colored tape and continue you taping. 

Hula Hoop Taping Pink Color Overlap Example

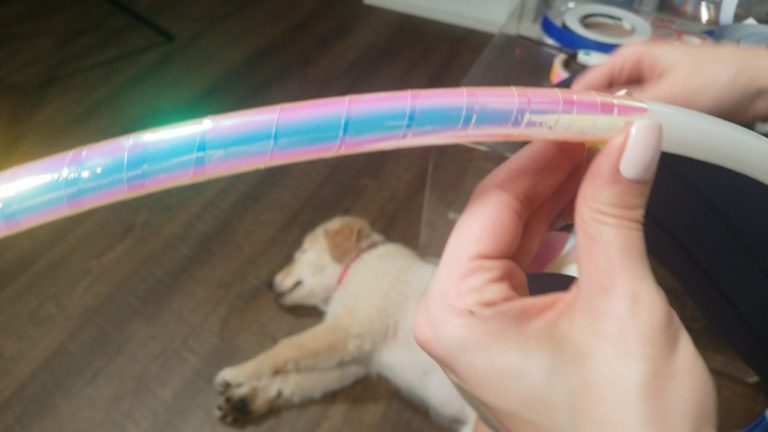
TIP: Avoid air bubbles by keeping the tape tight between your hand and the club. Apply the tape from one end and then applying pressure as you lay the rest of it down. If you spot air bubbles its best to use your fingers try to push them out or re-apply. Here are some close up angles to give you more detail.

Correct Hand Placement When Taping Hula Hoop To Prevent Air Bubbles
Pink Tape Applied Around Hula Hoop Zoom Of Basic Steps
Holding Pink Tape Tight Overlap On Hula Hoop Zoom

Congratulations!! You’ve taped your hoop! At this point or future steps, when you’ve had enough you can skip to the final step that will teach you how to add a layer of security to your design. If you want to create something really cool… then read on.

Hula Hoop Pink and Blue Tape Design Basic Plus Cute Puppy

Chapter 3:

How To Tape Hoops Like An Expert

This section is about adding more advanced design techniques to your hula hoop. 

If it’s your first hoop… don’t worry though, because the first tip is pretty easy to do. 

The other tips will show you how to add spirals plus even more spirals to your spirals!

Advanced Hula Hoop Taping Technique Taping Inner Diameter and Cute Puppy

1)This is is relatively easy trick to implement. All you do is add a color on the inside of the hula hoop. You can get more creative and add different colors but I will keep it simple with one color.

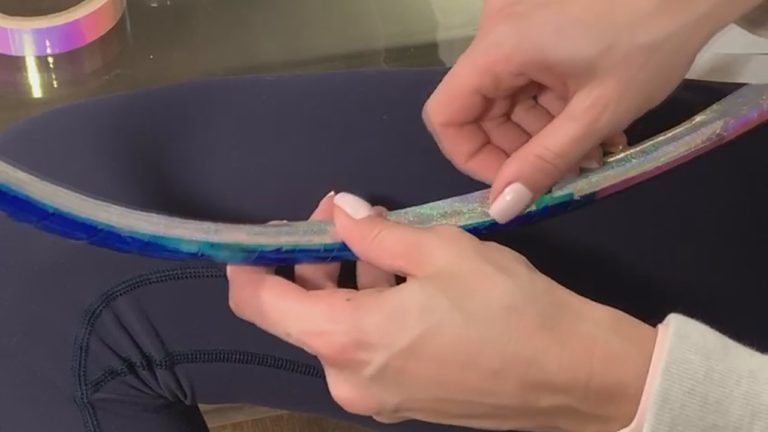
Silver Tape Applied on The Inside Of Hula Hoop For Beautiful Design Trick

Here is an up close shot of me finishing up the silver tape on the inside. Combining this with the right colors can make the hoop mesmerizing, especially with the right choreography.

TIP: Avoid air bubbles by keeping the tape tight between your hand and the club. Apply the tape from one end and then applying pressure as you lay the rest of it down. If you spot air bubbles its best to use your fingers try to push them out or re-apply.

2)Time for the spiral effects. Using the grey colored tape, I cut 18 – 24 inches of tape and then cut it again at a very long angle (imagine a very thin triangle). Starting at the point where the two colors meet we start wrapping it around the hoop gradually increase the space to give an nice spiral effect. 

Platinum Tape Swirl on Silver, Pink and Blue Hula Hoop. Plus a Cute Puppy.

3)Now I replicate the last step into the blue colored side of the hoop. 

Grey Colored Tape Being Taped to Hula Hoop For Swirl Design

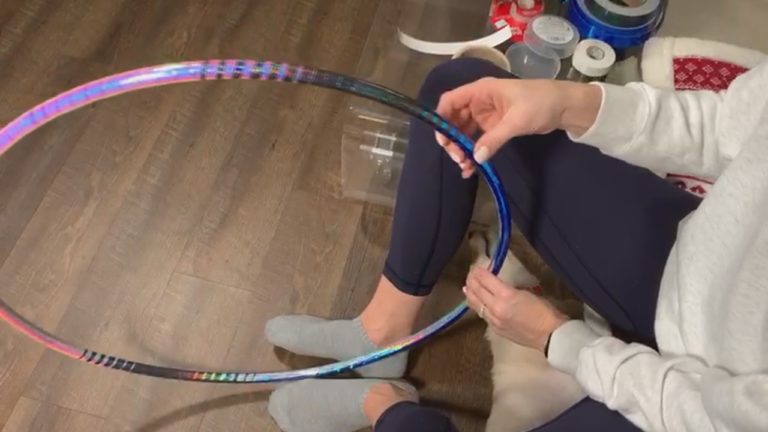
Here is an overhead image of what the finished top of the spiral design looks like.

Hula Hoop Spiral Tape Design Top of the Apparatus

4)Now I repeat the steps on the other side. You can see the silver we added on the inside gives the different tapes we added a multitude of colors especially with the holographic style tapes.

Hula Hoop Multi Color Spiral Design

5) From here I am gonna add “spirals into spirals”. To do this, cut a foot long piece of colored tape again about a foot long. Continue to cut it into a very thin triangle but with 2 of the sides at the same length. Start with one spiral and start by adding another spiral right below it. 

Taping Blue Spiral Design to Grey, Pink, and Silver Hula Hoop

6)Again the same steps with some of our primary colors all the way around the hula hoop. Using these tricks and the right colors you can really accomplish some amazing designs. 

Taping Hula Hoop Spiral to Spiral Design

You can optionally use some stamp cuts to add some shapes and letters to your design.  But I wont be applying them to this design. 

That’s it! You’ve mastered some basic and advanced skills. Now time for the last final steps to help our design last a little longer.

Bonus Chapter:

How To Protect Your Hoop Design

You have spent a lot of time, effort, heart, and hopefully not but maybe ever tears.

Now spend the time to protect it with this simple step.

As an added bonus this will help give an extra shine that looks pretty under direct lighting. 

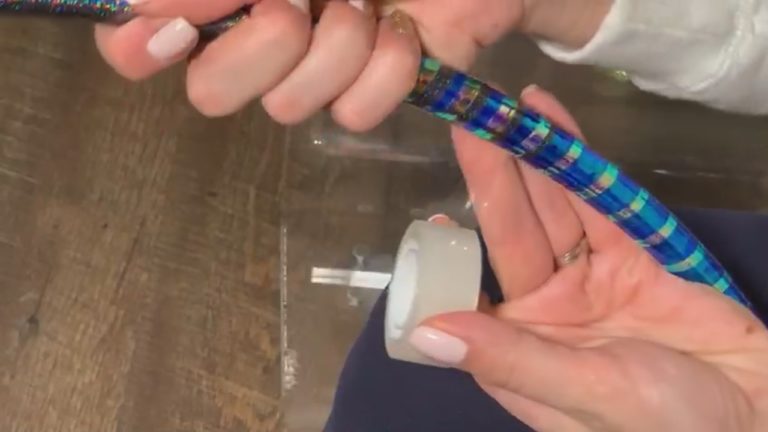
Hula Hoop Design Taped and Scotch Tape

1)Just add a layer of scotch tape going evenly around your design, once or twice.  This helps make it water proof and protect it from minor scratches and bumps.

Hula Hoop Taping Scotch to Protect your Design

TIP: Avoid air bubbles by keeping the tape tight between your hand and the club. Apply the tape from one end and then applying pressure as you lay the rest of it down. If you spot air bubbles its best to use your fingers try to push them out or re-apply.

Finally you are done. Sit back and take a look at your work of art. Good job and congratulations on a job well done. 

Conclusion:

Hula Hoop Tape Designs

You know a bunch of professional tips and tricks. 

Now, you have spent a lot of work and money on a professional design…. get the gear to protect it. 

Make it or buy it, but protect your hula hoop no matter what.

Check out Some Design Examples

Professionally Tape Designed Rhythmic Gymnastics Hula Hoop

Blue Glitter & Silver Metallic Hoop Tape Pattern

Jenerg Hula Hoop Tape Design Blue & Silver

Red Glitter, Black, & Silver Hoop Tape Metallic

Jenerg Red, Silver, Black Hoop Tape Pattern
Jenerg Red, White, Black Hoop Tape Pattern

Examples of Hula Hoop Tape Design Patterns

Hula Hoop Tape Design Patterns Jenerg

If you plan to travel a lot then a hoop cover is a must have accessory. The great thing is you don’t have to get complicated or expensive. Even a towel would work. Just make sure to plan ahead and think of something for extra defense. 

Now it’s your turn to share your thoughts. I’d love to hear what you think about my design. Comment below and share some great designs you’ve come up with. 

  • No comments yet.
  • Add a comment